
- Knowledge is power
- The Future Of Possible
- Hibs and Ross County fans on final
- Tip of the day: That man again
- Hibs and Ross County fans on final
- Spieth in danger of missing cut
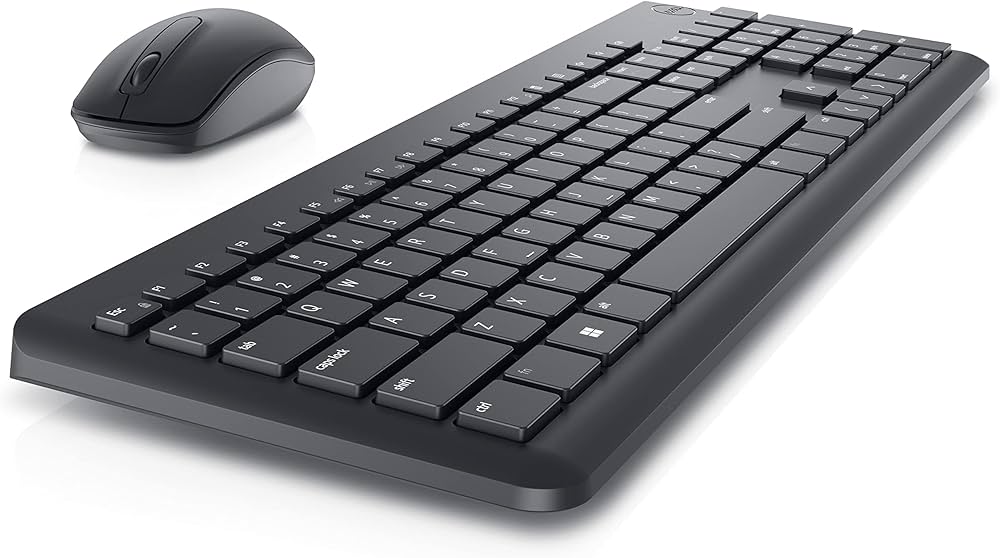
Dealing with a Dell keyboard that’s not working can be frustrating, but there are several troubleshooting steps you can take to resolve the issue. Here’s a comprehensive guide to help you fix a Dell keyboard that’s not working:
1. Check Physical Connections:
- Inspect Cable Connection: Ensure that the keyboard’s cable is securely plugged into the appropriate port on your computer. If you’re using a wireless keyboard, check the batteries and connection status.
- USB Port: Try connecting the keyboard to a different USB port on your computer to rule out port-related issues.
2. Restart Your Computer:
Sometimes, a simple restart can resolve minor software glitches or conflicts that may be causing the keyboard to malfunction. Restart your computer and check if the keyboard starts working again after the reboot.
3. Check for Driver Issues:
- Update Drivers: Outdated or corrupted keyboard drivers can cause functionality issues. Visit Dell’s official website and download the latest keyboard drivers for your specific model. Install the updated drivers and restart your computer.
- Device Manager: Alternatively, you can update keyboard drivers through the Device Manager:
- Press Windows key + X and select “Device Manager.”
- Expand the “Keyboards” category, right-click on your keyboard device, and select “Update driver.”
- Follow the on-screen instructions to search for and install updated drivers.
4. Run Hardware Diagnostics:
Dell computers often come with built-in hardware diagnostic tools that can help identify and resolve keyboard issues. Here’s how to run hardware diagnostics:
- Restart Your Computer: Turn off your computer and then turn it back on.
- Access BIOS: During the boot process, repeatedly press the appropriate key (usually F12 or F2) to access the BIOS or UEFI settings.
- Navigate to Diagnostics: In the BIOS or UEFI settings menu, locate the option for diagnostics or hardware tests.
- Run Diagnostics: Follow the on-screen instructions to run a comprehensive hardware diagnostic test, including the keyboard. Note any errors or issues detected during the test.
5. Check for Physical Damage:
Inspect the keyboard for any physical damage, such as spilled liquids, debris lodged between keys, or broken keys. Clean the keyboard using compressed air or a soft brush to remove any dust or debris that may be causing keys to stick or malfunction.
6. Enable Keyboard in BIOS:
Sometimes, the keyboard may be disabled in the BIOS or UEFI settings, leading to functionality issues. Follow these steps to enable the keyboard in BIOS:
- Restart Your Computer: Turn off your computer and then turn it back on.
- Access BIOS: During the boot process, repeatedly press the appropriate key (usually F2 or Del) to access the BIOS or UEFI settings.
- Navigate to Advanced Settings: In the BIOS or UEFI settings menu, locate the section for advanced settings or peripherals.
- Enable Keyboard: Look for an option related to the keyboard or USB devices and ensure that it’s enabled.
- Save Changes: Save the changes and exit the BIOS or UEFI settings. Your computer will restart.
7. Perform a System Restore:
If the keyboard issues started after a recent software installation or update, performing a system restore to revert your computer to a previous state may help. Here’s how to perform a system restore:
- Access System Restore: Type “System Restore” in the Windows search bar and select “Create a restore point” from the search results.
- Launch System Restore: In the System Properties window, click on the “System Restore” button.
- Choose a Restore Point: Select a restore point from a date when the keyboard was working correctly.
- Start the Restore Process: Follow the on-screen instructions to start the system restore process. Your computer will restart after the restore is complete.
8. Test the Keyboard on Another Computer:
To determine if the issue is with the keyboard itself or your computer, connect the keyboard to another computer and check if it works properly. If the keyboard functions normally on another computer, the issue likely lies with your original computer.
9. Use On-Screen Keyboard:
If you’re unable to resolve the keyboard issue, you can use the on-screen keyboard as a temporary solution. To access the on-screen keyboard:
- Open Accessibility Options: Type “Ease of Access” in the Windows search bar and select “Ease of Access keyboard settings” from the search results.
- Enable On-Screen Keyboard: In the Ease of Access keyboard settings, toggle the switch to enable the on-screen keyboard. You can then use the on-screen keyboard to input text and commands.
10. Contact Dell Support:
If none of the above solutions work, it may be time to seek assistance from Dell customer support team. Contact Dell’s technical support for further troubleshooting assistance or to inquire about warranty coverage for your keyboard.
By following these troubleshooting steps, you can often identify and resolve the issues causing your Dell keyboard to malfunction, restoring its functionality and ensuring a smoother computing experience.
How do I fix my keyboard not typing?
If your keyboard is not typing, try these troubleshooting steps:
- Check Physical Connections: Ensure the keyboard is properly connected to your computer.
- Restart Your Computer: A simple restart can resolve minor software glitches.
- Check for Driver Issues: Update keyboard drivers through Device Manager or reinstall them from the manufacturer’s website.
- Run Hardware Diagnostics: Use built-in diagnostic tools to identify hardware issues.
- Check for Physical Damage: Inspect the keyboard for damage or debris.
- Try Another Keyboard: Test with a different keyboard to determine if the issue is with the hardware.
- Contact Support: Seek assistance from the manufacturer or a computer technician if the issue persists.
Why is my Dell keyboard not typing?
If your Dell keyboard is not typing, several factors could be causing the issue:
- Physical connection: Ensure the keyboard is securely connected to your computer’s USB port or wireless receiver.
- Driver issues: Update keyboard drivers through Device Manager or reinstall them from Dell’s official website.
- Hardware problems: Check for physical damage, loose connections, or malfunctioning keys on the keyboard itself.
- Software conflicts: Verify that no software conflicts or compatibility issues are preventing the keyboard from functioning properly.
- System settings: Ensure keyboard settings are configured correctly in your operating system’s control panel.
If the issue persists, contact Dell support for further assistance.
How do I reset my Dell keyboard?
To reset your Dell keyboard, you can try the following steps:
- Unplug the Keyboard: If it’s a wired keyboard, unplug it from your computer’s USB port.
- Restart Your Computer: A simple restart can sometimes resolve minor issues with the keyboard.
- Reconnect the Keyboard: If it’s a wired keyboard, plug it back into your computer’s USB port. For wireless keyboards, ensure that the receiver is securely connected.
- Update Keyboard Drivers: Update keyboard drivers through Device Manager or reinstall them from Dell’s official website.
- Perform a System Restore: Restore your computer to a previous state when the keyboard was working correctly.
Can you accidentally lock your keyboard?
Yes, it’s possible to accidentally lock your keyboard using certain key combinations or settings. For example, on some laptops, pressing the “Fn” key along with another key, such as “F1” or “F6,” may activate a keyboard lock function. Additionally, some keyboards have a dedicated “lock” key that, when pressed, locks the keyboard until unlocked. In rare cases, software or driver issues may also cause the keyboard to become unresponsive or locked. If you suspect your keyboard is locked, try pressing the “Fn” key along with the corresponding unlock key or consult your device’s user manual for specific instructions.
How do I unlock my Dell keyboard?
To unlock your Dell keyboard, try these steps:
- Check for Lock Key: Look for a “Num Lock,” “Caps Lock,” or “Scroll Lock” key on your keyboard. Pressing these keys may toggle the keyboard lock.
- Press Function Key: Some Dell laptops have a function key (Fn) that, when pressed along with another key, can unlock the keyboard. Look for a key labeled “Fn” or “Function” and try pressing it with the corresponding unlock key (e.g., F1, F2, F12).
- Restart Your Computer: A simple restart can sometimes resolve keyboard lock issues by resetting system settings.
How do you unfreeze your keyboard?
To unfreeze a keyboard, try the following steps:
- Check for Physical Obstructions: Ensure there are no physical obstructions, such as debris or spilled liquids, blocking the keys.
- Restart Your Computer: A simple restart can sometimes resolve keyboard freeze issues by resetting system settings.
- Update Keyboard Drivers: Update keyboard drivers through Device Manager or reinstall them from the manufacturer’s website.
- Check for Software Conflicts: Verify that no software conflicts or compatibility issues are causing the keyboard to freeze.
- Perform a System Restore: Restore your computer to a previous state when the keyboard was functioning correctly.
How do I reset an unresponsive keyboard?
To reset an unresponsive keyboard, try the following steps:
- Restart Your Computer: A simple restart can sometimes resolve issues with unresponsive keyboards by resetting system settings.
- Check Physical Connections: Ensure the keyboard is securely connected to your computer’s USB port or wireless receiver.
- Update Keyboard Drivers: Update keyboard drivers through Device Manager or reinstall them from the manufacturer’s website.
- Perform a Power Cycle: Disconnect the keyboard from your computer and wait for a few minutes before reconnecting it.
- Check for Physical Damage: Inspect the keyboard for physical damage or debris that may be causing it to become unresponsive.
Why did my keyboard suddenly stop working?
Several factors could cause your keyboard to suddenly stop working:
- Physical damage: Spilled liquids, physical impacts, or debris can damage the keyboard and render it unresponsive.
- Software issues: Corrupted drivers, conflicting software, or system updates may cause keyboard malfunctions.
- Connection problems: Loose or damaged cables, faulty USB ports, or wireless connection issues can interrupt communication between the keyboard and the computer.
- Battery issues: If you’re using a wireless keyboard, depleted batteries or a faulty battery connection can cause it to stop working.
- Hardware failure: Internal components of the keyboard may fail due to wear and tear over time.
Why is my Dell touchpad not working properly?
If your Dell touchpad is not working properly, several factors could be at play:
- Driver issues: Outdated or corrupted touchpad drivers may cause malfunctions. Update drivers through Device Manager or reinstall them from Dell’s website.
- Settings: Check touchpad settings in Control Panel or Dell Touchpad settings to ensure they are configured correctly.
- Physical damage: Spilled liquids, physical impacts, or debris can damage the touchpad and hinder its functionality.
- Battery issues: If your laptop has a removable battery, removing and reinserting it may reset the touchpad.
- Hardware failure: Internal components of the touchpad may fail due to wear and tear.
How do I enable keyboard typing?
If your keyboard typing is disabled, try these steps to enable it:
- Check for Physical Damage: Ensure there are no physical obstructions or damage to the keyboard.
- Restart Your Computer: A simple restart can sometimes resolve keyboard issues by resetting system settings.
- Update Keyboard Drivers: Update keyboard drivers through Device Manager or reinstall them from the manufacturer’s website.
- Check Keyboard Settings: Verify that keyboard settings in your computer’s control panel are configured correctly.
- Try Another Keyboard: Test with a different keyboard to determine if the issue is with the hardware.
If the issue persists, consult your device’s user manual or contact technical support for further assistance.

Is there a button that locks the keyboard?
Yes, some keyboards have a “lock” button or key that can toggle keyboard functions on or off. Common lock keys include “Caps Lock,” “Num Lock,” and “Scroll Lock.” Pressing these keys activates or deactivates their respective functions. For example, pressing the “Caps Lock” key toggles capitalization mode, while “Num Lock” activates the numeric keypad. Additionally, some keyboards have a “Fn” (function) key that, when pressed along with another key, can lock specific functions or keys. Consult your keyboard’s user manual or look for labeled keys to identify lock functions.
Why are some keys not working in a laptop keyboard?
Some keys on a laptop keyboard may not work due to various reasons:
- Physical damage: Spilled liquids, debris, or physical impacts can damage individual keys or the keyboard circuitry.
- Software issues: Corrupted or outdated keyboard drivers, conflicting software, or system updates may cause key malfunctions.
- Connection problems: Loose or damaged keyboard cables, faulty connectors, or keyboard ribbon cable issues can disrupt communication with the motherboard.
- Hardware failure: Internal components of the keyboard, such as key switches or membrane layers, may fail due to wear and tear over time.
How do I unlock my Dell touchpad?
To unlock your Dell touchpad, follow these steps:
- Use Function Key: Many Dell laptops have a function key (usually labeled “Fn”) that can toggle the touchpad on and off. Press the “Fn” key along with the corresponding function key (often one of the F1-F12 keys) that has an icon representing a touchpad or mouse.
- Check Touchpad Settings: In Windows settings or Dell Touchpad settings, ensure that the touchpad is enabled. Look for options to enable or disable the touchpad and adjust sensitivity settings.
- Restart Your Computer: A simple restart may also resolve touchpad issues.
How to enable function keys on Dell laptop?
To enable function keys on a Dell laptop, follow these steps:
- Access BIOS/UEFI: Restart your laptop and repeatedly press the appropriate key (usually F2 or Del) during the boot process to enter the BIOS or UEFI settings.
- Navigate to Function Key Behavior: In the BIOS or UEFI settings, locate the “Advanced” or “System Configuration” section.
- Enable Function Key Behavior: Look for an option related to “Function Key Behavior” or “Action Keys Mode.” Select “Function Key” or “Multimedia Key” mode, depending on your preference.
- Save Changes and Exit: Save the changes you made and exit the BIOS or UEFI settings. Your function keys should now be enabled.